
Best TV Mounts for Brick Walls A Complete Guide
When you’re looking for the best TV mounts for brick walls, you have to understand that not all mounts can handle the job. The only real choice is a heavy duty fixed, tilting, or full motion mount specifically rated for masonry. You’ll also need to pair it with high quality sleeve anchors or lag shields, because the hardware that comes in the box is almost always meant for wood studs and simply won’t work for brick.
Why Mounting a TV on Brick Is Different
Mounting a TV on a brick wall gives you that timeless, industrial chic look and saves a ton of floor space, but it’s a completely different ballgame than working with standard drywall. While drywall is just a hollow wall with wood studs for support, a brick wall is a solid, unforgiving surface. This one difference changes everything about how you approach the installation.
Think of it this way: hanging a picture on drywall is like using a thumbtack on a corkboard—it’s simple and you can’t mess it up too badly. Mounting a TV on brick is more like anchoring a heavy shelf to a solid block of stone. It demands specialized tools and hardware to get a secure hold that will last for years. Those standard screws and plastic anchors you find in most TV mount boxes? They are designed for wood studs and will fail spectacularly in brick.
The Unique Challenges of Masonry
The biggest challenge is the nature of the brick itself. It’s incredibly strong when you push on it (compression), but it can be brittle and crack if you’re not careful. Using the wrong kind of force or a bad drilling technique can cause the brick to crumble, ruining the spot you need for a secure anchor. This is exactly why your standard drill won’t cut it; you need a hammer drill to power through the masonry without causing damage.
On top of that, you have to anchor directly into the solid part of the brick, not the softer mortar joints in between. Mortar was never designed to handle the pulling force (what we call shear stress) that a heavy, cantilevered TV can exert, especially if you’re using a full motion mount that extends out from the wall.
The most important rule for a secure installation is that the anchor has to create an unbreakable grip inside the brick itself. A weak anchor point in the mortar is just asking for trouble, risking serious damage to your wall and your expensive television.
Market Trends and Mounting Demands
As TVs get bigger and heavier, the demand for strong, reliable mounting solutions has skyrocketed. It’s no surprise that the global television mount market was valued at USD 1.91 billion in 2024 and is projected to keep growing. This trend really highlights how much people care about getting a secure, professional grade installation, especially on tricky surfaces like brick.
Getting these foundational concepts right is the first step toward a successful project. Brick walls present a unique set of hurdles, but they’re just one of several surfaces homeowners run into. You can learn more about how to mount TVs on 8 different types of walls in our expert guide. With the right knowledge and tools, you can confidently get a setup that’s both secure and looks incredible.
How to Choose the Right TV Mount for Brick

Picking the right mount for a brick wall is about more than just looks—it’s a matter of safety and structural integrity. Unlike drywall, where you’re hunting for studs, brick provides a solid but totally unforgiving surface. The mount you choose has to be built for the unique stresses of masonry while still matching your TV and how you like to watch it.
Your choice really comes down to three main types of mounts. Each one has its own set of pros and cons when you’re dealing with a brick surface. Getting to know how each one interacts with the wall is the first step toward making a decision you can feel good about.
Comparing TV Mount Types for Brick Wall Installation
To simplify your choice, let’s break down how each mount type stacks up when installed on a brick wall. This table gives a quick overview of what to expect in terms of stability, complexity, and cost for each option.
| Mount Type | Best For | Brick Wall Stability | Installation Complexity | Typical Cost |
|---|---|---|---|---|
| Fixed | Maximum security and a clean, low profile look. | Excellent | Low | $ |
| Tilting | Mounting above eye level (e.g., over a fireplace) to reduce glare. | Very Good | Low to Medium | $$ |
| Full Motion | Rooms requiring multiple viewing angles or corner placement. | Good (with caution) | High | $$$ |
As you can see, the more flexibility a mount offers, the more critical the installation becomes. Now, let’s dig into the details of each one.
H3: Fixed TV Mounts: The Stability Champions
A fixed TV mount, often called a low profile mount, is hands down the simplest and most secure way to go on brick. Think of it like a heavy duty picture frame for your TV. It holds the screen flat against the wall with zero tilt or swivel, giving you a clean, minimalist look.
Because it doesn’t move, a fixed mount spreads the TV’s weight perfectly evenly across all its anchor points. This static load is exactly what you want for brick, as it cuts down on the pulling or “shear” forces that could weaken the anchors over time. If your number one priority is rock solid security, this is one of the best TV mounts for brick walls.
The reliability of fixed mounts has made them a market leader. In fact, the fixed TV wall mount industry was valued at around USD 2.45 billion globally in 2025. This huge market share is a testament to their dependability, especially for solid wall installations.
H3: Tilting TV Mounts: Finding the Perfect Angle
A tilting TV mount gives you a bit more flexibility. It allows you to angle the screen vertically, usually about 15 degrees downward. This is the perfect solution for mounting a TV higher up on a wall, like over a fireplace, because it lets you tilt the screen down toward your couch to kill glare and improve the viewing angle.
Even though it introduces some movement, the forces are still pretty minor and well contained. The mount stays close to the wall, and the downward tilt puts predictable stress on the upper anchor points. For a brick installation, a tilting mount is still a very secure choice, striking a great balance between stability and function.
H3: Full Motion Mounts: The Ultimate Flexibility
A full motion mount, also known as an articulating mount, offers the most versatility by far. Its extendable arm lets you pull the TV away from the wall, swivel it left and right, and tilt it up and down. This is fantastic for open concept living rooms or any space where you need to watch TV from different spots.
However, this flexibility comes with a serious warning for brick installations.
When a fullmotion mount is extended, it acts like a lever. This multiplies the force pulling on the anchors, creating significant dynamic stress on the brick. An 80 pound TV can exert several hundred pounds of pulling force on the top bolts when the arm is fully extended.
This makes a flawless installation absolutely non negotiable. Every single anchor must be set perfectly into solid brick—not the mortar in between—to handle these amplified forces. While you can use full motion mounts on brick, they require top tier hardware and an expert installation technique. If you’re considering one, you have to be 100% confident you can create an unbreakable anchor point. For a deeper look into mount types, check out our guide on what type of wall mount to use for your specific needs.
H3: Matching the Mount to Your TV
Beyond the type of mount, you have to make sure it’s actually compatible with your television. Before you buy anything, check these three key factors:
- TV Weight: Every mount has a maximum weight capacity. Play it safe and always choose a mount rated to hold at least 1.5 times your TV’s actual weight.
- Screen Size: Mounts are designed for a specific range of screen sizes. This is to ensure the mounting plate won’t be peeking out from behind the TV.
- VESA Pattern: The VESA pattern is simply the standard layout of the four mounting holes on the back of your TV. Your mount must match this pattern (e.g., 400x400mm).
Choosing the right mount is the foundational first step. By matching the mount type to your room and ensuring it’s properly rated for your TV, you’re setting yourself up for a secure and successful installation on your brick wall.
Your Essential Toolkit for Masonry TV Mounting
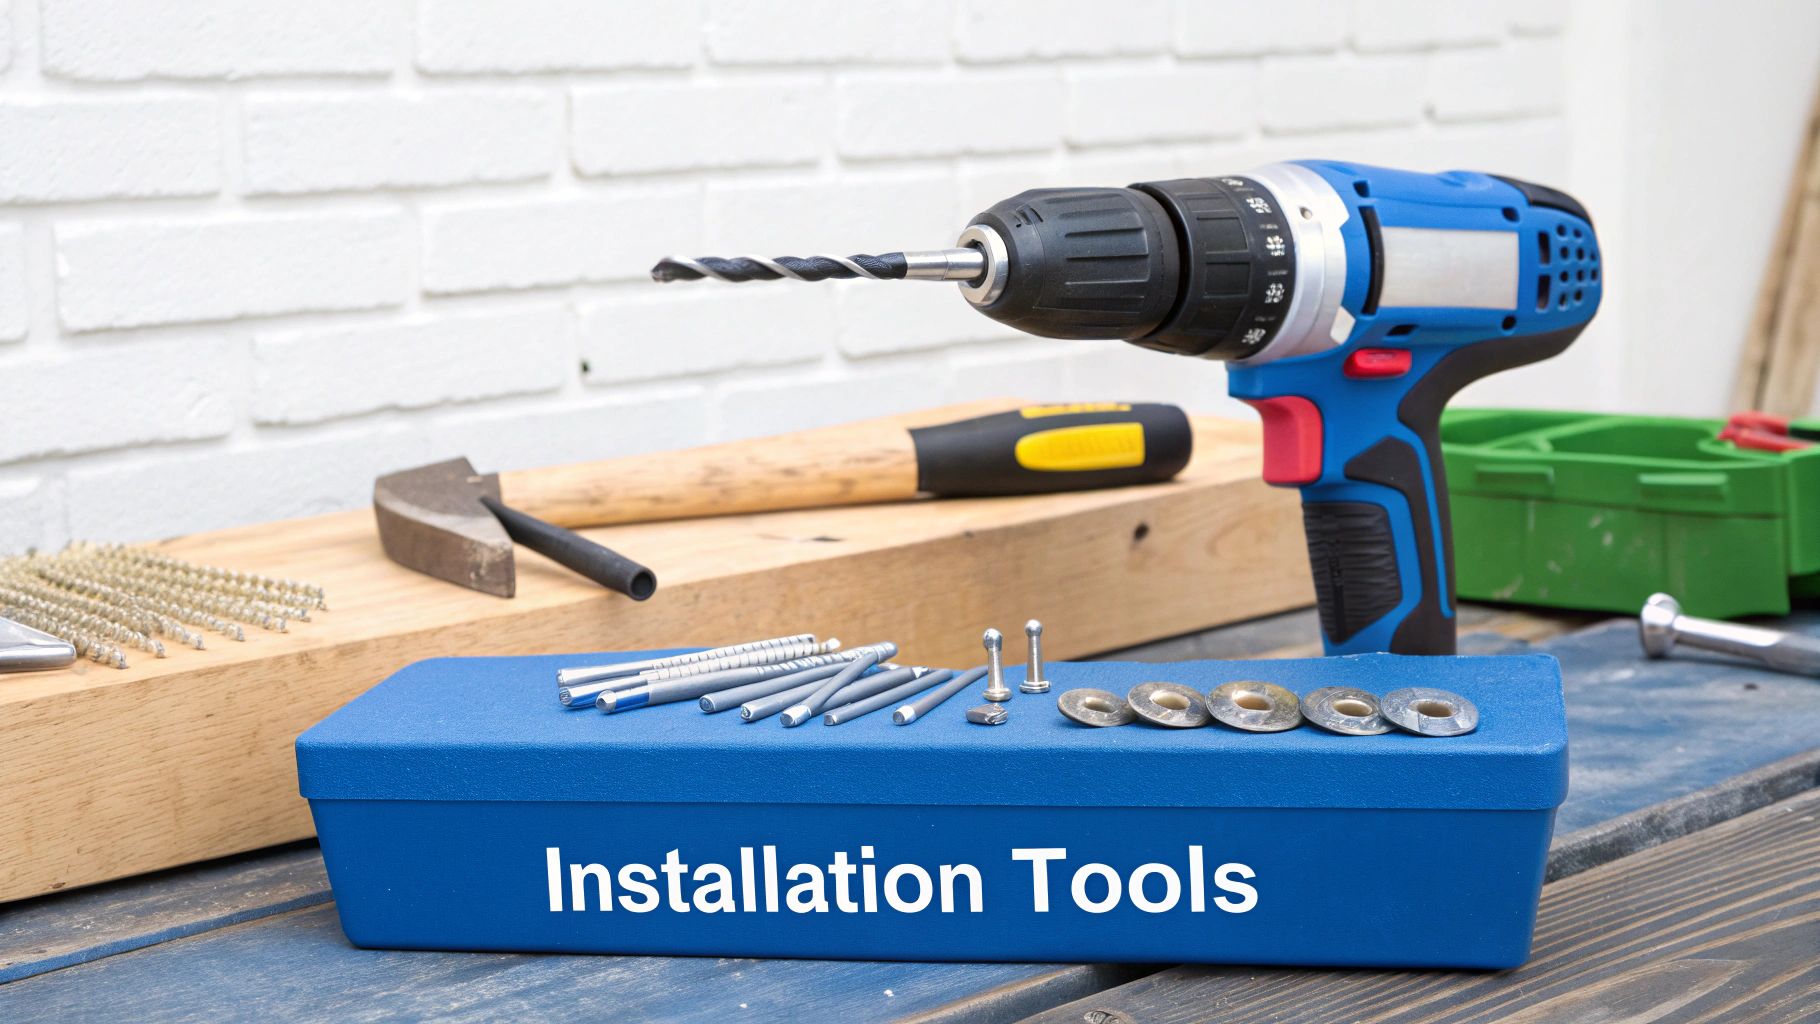 Trying to mount a TV on a brick wall without the right gear is a recipe for disaster. It’s like trying to cut a steak with a butter knife—you’ll make a mess, get frustrated, and probably won’t succeed. This isn’t a job where you can just grab your standard toolbox and hope for the best. Masonry demands specific tools, and having them ready before you start is the key to a safe, secure mount.
Wrestling with the wrong drill or cheap bits isn’t just a waste of time; it’s genuinely risky. A regular drill will burn out, and the wrong bit can crack the brick or shatter completely. Putting together the right toolkit isn’t just a recommendation; it’s the most critical step you’ll take.
The Power Tools You Absolutely Need
For a brick wall, one tool is completely non negotiable: a hammer drill. Don’t confuse this with a standard drill. While a regular drill just spins, a hammer drill adds a rapid fire, percussive punching motion. This one, two punch pulverizes the dense material as it drills, letting you cut through tough brick cleanly and efficiently.
A regular drill just scrapes and grinds, creating a ton of friction and heat. The hammer drill, on the other hand, chips away at the brick with thousands of tiny impacts every minute. The difference is night and day.
Ever tried drilling into concrete with a standard drill and watched the bit skate all over the surface? That’s called “walking.” The pounding action of a hammer drill keeps the bit planted exactly where you want it, ensuring your holes are precise and your mount is perfectly aligned.
Essential Bits and Hand Tools
The right drill is only half the battle; it’s useless without the right accessories. Your drill bits are just as important as the drill itself. Here’s what else you need in your arsenal:
- Carbide Tipped Masonry Drill Bits: These are the only bits that can handle the job. The ultra hard carbide tip is designed to withstand the brutal friction and impact of drilling into brick without dulling instantly. Make sure you get the exact size specified for your anchors.
- High Quality Level: Nothing screams “amateur job” like a crooked TV. A good 24-inch or 48-inch level gives you a much more accurate reading across the entire wall plate than a smaller torpedo level would.
- Socket Wrench Set: You’ll be driving some heavy duty lag bolts into those wall anchors. A socket wrench gives you the leverage needed to tighten them down securely without stripping the heads—something a power drill or screwdriver just can’t do.
Safety and Cleanup Gear
Drilling into brick is messy. It creates a fine, gritty dust and can send sharp fragments flying. Protecting yourself and keeping the area clean is just as important as getting the mount straight.
- Protective Eyewear: This is mandatory. Seriously. Brick dust and sharp chips can cause severe eye injuries in an instant.
- Dust Mask: You do not want to be breathing in brick and mortar dust. A simple N95 mask will protect your lungs.
- Shop Vacuum: A shop vac is your best friend for this project. Use it to suck the dust right out of the hole as you’re drilling. This not only contains the mess but also ensures the hole is clean—leftover dust can weaken the anchor’s grip and compromise the whole installation.
With this toolkit ready to go, what seems like a daunting task becomes a straightforward, manageable project. It ensures every hole is drilled right and every bolt is tightened securely, giving you a perfectly mounted TV that you know isn’t going anywhere.
Understanding Masonry Anchors for a Secure Hold
When you’re mounting a TV on a brick wall, the mount itself is only half the story. The real heroes doing the heavy lifting are the masonry anchors. These small but mighty pieces of hardware are what create that unbreakable grip inside the brick, making sure your expensive TV stays exactly where you put it.
Think of it like this: the TV mount is the skeleton, but the anchors are the muscles holding it tight to the wall. If those muscles are weak, the whole thing comes crashing down. This is exactly why the little plastic plugs and screws included with most TV mounts are totally useless for brick; they’re designed for wood studs and will pull right out of masonry under load.
Choosing the right anchor isn’t just a good idea—it’s the most critical part of getting a secure, long lasting setup.
The Anatomy of a Powerful Grip
To get why you need specialized anchors, you have to understand how they work. Unlike a simple screw you’d drive into wood, a masonry anchor is engineered to expand once it’s inside the drill hole.
This expansion creates a massive amount of outward pressure against the inside of the brick, generating incredible friction and holding power. It’s this brilliant bit of engineering that allows the anchor to fight the constant downward pull of gravity and the side to side “shear” forces from a swiveling TV, turning a simple hole into a rock solid mounting point.
Top Choices for Masonry Anchors
While you’ll find a few options out there, three types of anchors stand out as the most reliable choices for hanging a TV on a brick wall. Each one works a little differently, but they all get the job done right.
- Lag Shields: These are simple but incredibly effective metal shields. You pop the shield into the drill hole, then drive a lag screw into it. As the screw goes in, it forces the shield to expand, gripping the sides of the hole tight.
- Sleeve Anchors: A sleeve anchor is an all-in-one powerhouse that includes a bolt, washer, nut, and an expandable sleeve. As you tighten the bolt, the sleeve expands forcefully against the brick, creating an extremely strong connection that’s perfect for heavy duty jobs.
- Concrete Screws (Tapcons): These specialty screws are designed to cut their own threads directly into the masonry. They offer a quick and easy installation but are generally best for lighter TVs on fixed mounts, as their holding power can be slightly less than true expansion anchors.
The core principle is simple but vital: always drill into the solid part of the brick, never the mortar joints. Mortar is significantly weaker and can easily crumble under the stress of an anchor, leading to a catastrophic failure. Aim for the center of a solid, healthy brick every time.
Matching the Anchor to the Load
The anchor you choose should always depend on your TV’s weight and the type of mount you’re using. For a lightweight TV on a fixed mount, a set of quality concrete screws might be enough. But if you’re hanging a heavy screen on a full motion mount, you absolutely need heavy duty sleeve anchors or lag shields to handle those amplified forces.
Mounts built for brick walls often come with features like adjustable bolting systems and include heavy duty anchors designed to support weights over 110 lbs. They also feature corrosion resistant finishes to handle masonry’s rough texture. These specs are there to meet safety standards and give you a permanent, stable fixture. You can discover more insights about the diverse features in the TV mount market.
Ultimately, investing in the correct, high quality masonry anchors is non negotiable. They are the linchpin of a safe installation and provide the peace of mind that comes from knowing your TV isn’t going anywhere. This knowledge empowers you to select the best TV mounts for brick walls and the right hardware to go with them.
A Step By Step Guide to Mounting Your TV on Brick
Okay, you’ve got your mount, your anchors, and a battle ready toolkit. It’s time for the main event. This is where a little bit of patience and precision will pay off big time, giving you a rock solid, professional looking install.
We’re going to walk through this whole process step by step. Don’t worry—what seems like a heavy duty project is actually pretty straightforward when you break it down.
Step 1: Plan Your TV Placement
Before you even think about drilling, you have to nail down the perfect height and location. The golden rule is to place the center of the screen at eye level from wherever you’ll be sitting most. The most common mistake people make is mounting the TV way too high, leading to a sore neck after a movie marathon.
Here’s a great trick: cut a piece of cardboard to the exact size of your TV. Use painter’s tape to stick it on the wall. Live with it for a day or two. If it feels right, you’re ready to commit.
Step 2: Mark Your Drilling Locations
Once you’ve locked in the perfect spot, it’s all about precision. Place the TV mount’s wall plate against the brick and grab your level to ensure it’s perfectly horizontal. A slightly crooked mount will drive you crazy later, and it’s a pain to fix.
Hold the plate firmly against the wall and use a pencil to mark the center of each bolt hole directly onto the brick. Double check your marks with the level one last time. For a deeper dive into general mounting best practices, check out our step by step guide to mounting your flat screen TV on the wall.
Step 3: Drill the Pilot Holes
This is the moment of truth—and the messiest part of the job. Gear up with your safety glasses and dust mask, because brick dust gets everywhere. With your hammer drill and the right carbide tipped masonry bit, you’re ready to create the pilot holes for your anchors.
Start drilling slowly to create a little divot in the brick. This keeps the bit from “walking” or skipping across the surface. Once you have a good starting point, increase your speed. Apply firm, steady pressure, but don’t try to force it. Let the hammer drill do the heavy lifting.
Pro Tip: To save yourself a massive cleanup job, just tape an open envelope to the wall right below where you’re drilling. It catches most of the dust. After drilling, use a shop vac to suck every last bit of dust out of the holes. This is critical for getting a secure grip with the anchor.
Step 4: Install the Masonry Anchors
With your holes drilled and perfectly clean, it’s time to set the anchors. The technique is slightly different depending on what kind you’re using:
- For Lag Shields: Use a hammer to gently tap the shield into the hole until it’s completely flush with the brick surface.
- For Sleeve Anchors: Slide the entire anchor assembly into the hole. It should be a snug fit. Tap it in carefully until the washer is pressed firmly against the wall.
Make sure every anchor is fully seated and feels solid. A wobbly anchor now means a wobbly TV later.
Step 5: Secure the Mount to the Wall
Almost there. Line up the wall plate of your TV mount over the anchors you just installed. Insert the lag bolts through the plate and into the shields, or simply start tightening the nuts on your sleeve anchors.
Use a socket wrench to tighten everything down, alternating in a star pattern like you’re changing a tire. This ensures the pressure is distributed evenly across the plate. You want the bolts to be very snug, but do not over tighten them. Cranking too hard can crack the brick or strip the anchor right out. The plate should feel absolutely locked to the wall with zero movement.
Step 6: Attach the Brackets and Hang the TV
The hard part is officially over. Attach the vertical mounting brackets to the back of your TV with the screws provided, lining them up with the VESA holes.
Now, grab a friend—seriously, don’t try this alone—and carefully lift the TV. Hook the brackets onto the wall plate. Most mounts have a locking system, often an audible “click” or a set of screws at the bottom, to secure the TV in place. Once it’s locked, give the TV a gentle tug to be sure it’s not going anywhere.
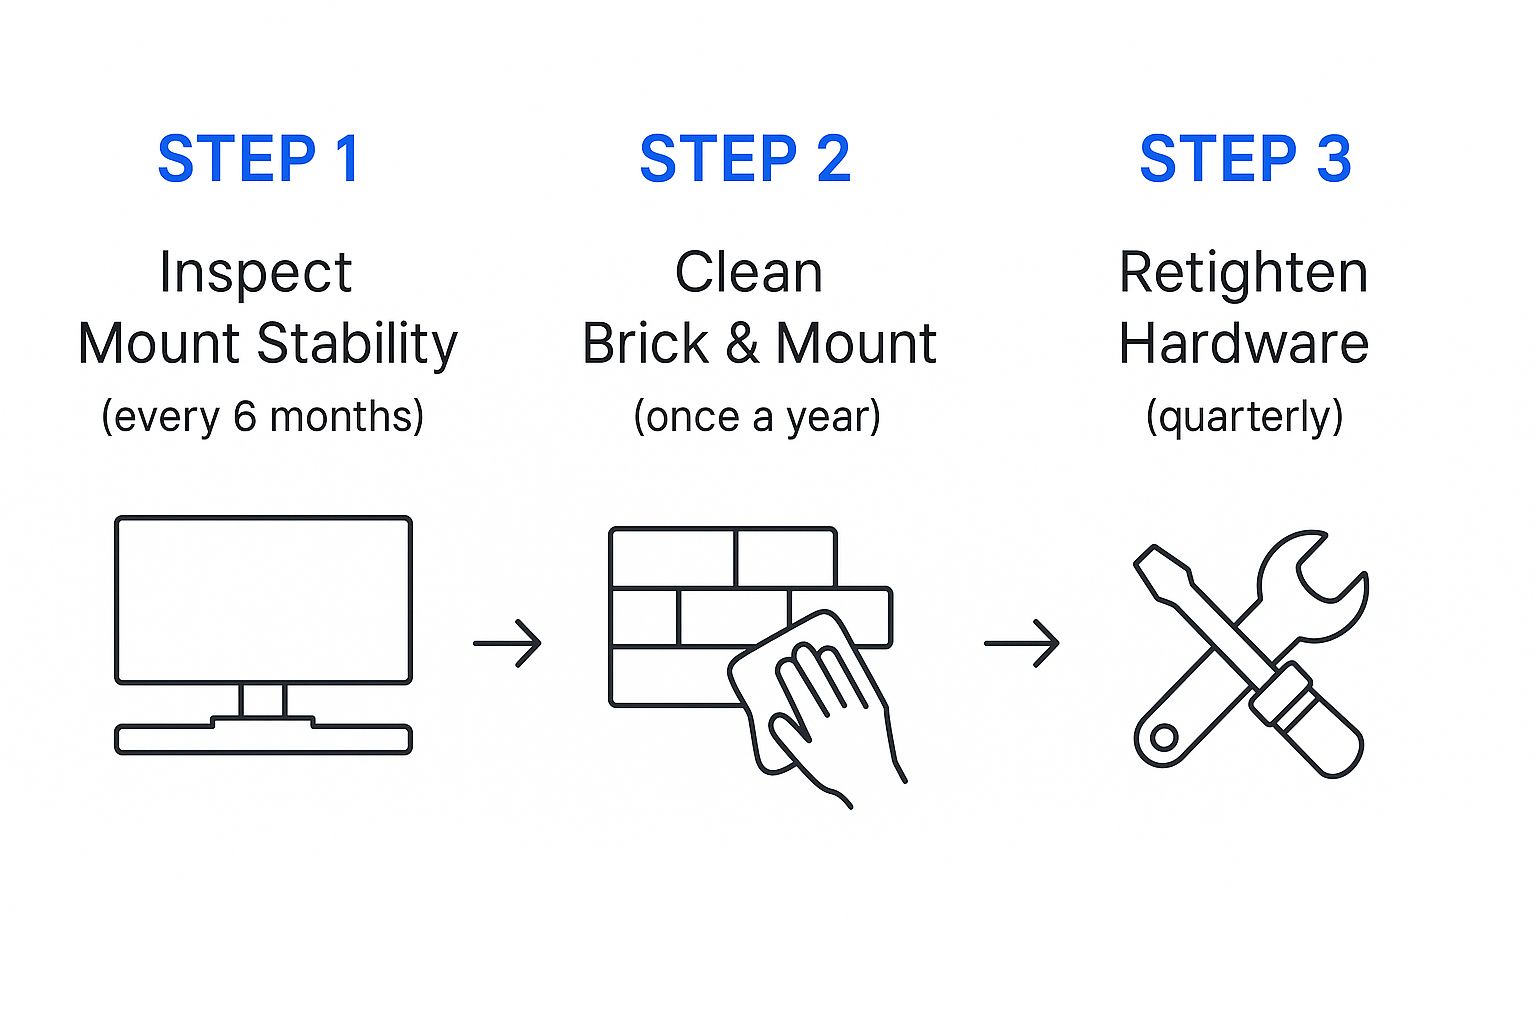
A secure installation is great, but long term safety comes from a little upkeep. By occasionally checking for stability, wiping down surfaces, and re-tightening any hardware that might have loosened over time, you ensure your setup remains as solid as the day you installed it.
Common Mistakes to Avoid When Mounting on Brick

Mounting a TV on a beautiful brick wall looks fantastic when it’s done right. But a few simple mistakes can quickly turn a rewarding weekend project into a disaster involving a cracked wall or a smashed TV. The best way to guarantee a secure, professional looking job is to learn from the common pitfalls others have fallen into.
The single most dangerous mistake is drilling in the wrong place. It’s incredibly tempting to aim for the softer mortar lines between the bricks—it just seems easier. This is a critical error. Mortar is only meant to handle compression (pushing) forces, not the constant tension (pulling) force from a heavy TV hanging off the wall. Over time, it will simply crumble.
Ignoring the Debris
Another rookie mistake is failing to clean out the drill holes properly. When you drill into brick, you kick up a ton of fine, gritty dust. If you leave that dust in the hole, it creates a sandy barrier between your anchor and the solid brick.
This layer of debris prevents the anchor from expanding and getting the solid grip it needs, which can seriously compromise its holding power. A quick blast of compressed air or a pass with a shop vac is an absolute must for a truly secure fit.
A study on masonry anchor failures found that improper hole cleaning can slash an anchor’s load capacity by as much as 60%. The anchor needs direct, solid contact with the brick to do its job.
Using the Wrong Hardware or Technique
Even if you’ve picked the perfect spot and cleaned your holes, using the wrong gear or just being too aggressive can ruin the whole project. This is the final stretch where many DIY installations go wrong.
- Using the Included Hardware: The screws and plastic plugs that come in the box with your TV mount are almost always meant for drywall and wood studs. Tossing them in brick is asking for trouble. You absolutely must go out and buy a set of dedicated masonry anchors.
- Over Tightening the Bolts: It makes sense to want the mount to feel rock solid, but there’s a limit. If you crank down on the bolts with all your strength, you can easily crack the face of the brick or strip the anchor inside the wall, making it completely useless. Tighten until the mount is snug and won’t budge, then stop.
- Skipping the Level: Never, ever “eyeball it.” A mount that’s even slightly crooked will be glaringly obvious once the TV is hanging on it, and fixing it means drilling a whole new set of holes. Always use a good level to triple check your placement before you even think about drilling.
By sidestepping these common blunders, you’ll be well on your way to a flawless installation. Even the best tv mounts for brick walls are only as strong as the person installing them, and paying attention to these details ensures your TV stays safely on the wall where it belongs.
Common Questions About Mounting a TV on Brick
Even the best laid plans can hit a snag. When you’re dealing with something as unforgiving as brick, a few questions are bound to pop up. Here are the answers to the most common ones we hear from DIYers.
Can I Mount a TV on Painted Brick?
Yes, you absolutely can. Painted brick has the same structural strength as raw brick, so the process doesn’t change one bit. The real challenge is keeping that paint job looking sharp.
Instead of marking your drill spots with a pencil that can leave a permanent smudge, use painter’s tape. It’s also smart to expect a little bit of paint to chip around the drill hole—it’s almost impossible to avoid. The pro move? Have a small amount of matching touch up paint ready to go. Once the mount is up, you can dab any small flakes and make the finish look flawless.
Key Takeaway: The paint doesn’t affect the brick’s strength. Your goal is cosmetic: use painter’s tape for marking and keep touch up paint handy for any minor chips that happen when you drill.
What if I Drill a Hole in the Wrong Place?
It happens to the best of us, so don’t sweat it. If you’ve got a misplaced hole, the key is to fill it correctly to restore the look of your wall and keep moisture out.
Head to any hardware store and grab a color matched masonry filler or a mortar repair caulk. Just clean the dust out of the hole, squeeze the filler in, and smooth it out so it’s flush with the brick. To really make it blend in, you can stipple the surface with a stiff brush before it dries to mimic the brick’s natural texture.
Still have questions or just want the peace of mind that comes with a professional job? The certified technicians at TV Mounting Houston have the tools and experience to get any TV mounted perfectly, on any surface. Learn more at https://www.tvmounting-houston.com.


